|
|
|
Categories
|
|
Information
|
|
Featured Product
|
|
|
 |
|
|
There are currently no product reviews.
 ;
A comprehensive Operating and Service Manual. All schematics are complete and easy to read. The PCB drawings and complete parts list are very helpful. I would definitely recommend this manual.
;
SCANNING OF HIGH QUALITY
VERY, VERY HIGH VELOCITY DOWNLOAD
VERY GOOD PRICE,
TRUE SATISFIED, THANKS
;
Genuine Toshiba owner's manual. Couldn't really ask for more. And written in understandable English in contrast to a few recent experiences I have had with manuals for other equipment other than Toshiba but made in China and written in "Chinglish"!
;
I purchased a vintage Sony mixer off eBay and within the hour was able to locate and purchase the manual for it.I mean really,where else can you find a manual for a product made in 1983!? It was easy to find and purchase/download the manual I needed.I will use this site again for other equipment I have! Great site!
;
manual de usuario perfecto y completo de buena calidad de impresion y muy detallado ideal !
Installation
9
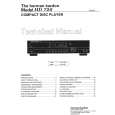
To prevent possible damage to your speakers and other components in your audio system, it is important that ALL components, including the HD720 and receivers are turned off and unplugged from their AC power source when installing any new component. Connecting the HD720 to your audio system is simple. Using standard RCAto-RCA interconnect cords, connect the left and right Fixed Audio Output jacks � on the rear panel to the CD input jacks on your receiver, surround processor or preamplifier. If your system includes an optional, external digital-to-analog converter, or if you are using a receiver or other processor that has the capability to decode PCM digital input signals, connect the Coaxial Digital Output jack ¡ to the Datastream Digital input on the decoder. Make certain to use a coaxialstyle interconnect cable, as standard audio cables will not perform as well. Install the two AA batteries supplied with the HD720�s remote by turning the remote over so that you are holding the bottom side up. Press lightly on the embossed arrow on the cover, and gently slide the cover towards you in the direction of the arrow. Insert the batteries inside the compartment, being careful to follow the + and � polarity indications at the bottom of the compartment. Replace the cover by placing it on the remote and sliding it back towards the top of the remote.
NOTE: When replacing batteries it is always a good idea to replace both at the same time. When the unit will not be used for an extended period of time, it is also a good idea to remove the batteries so that the potential for corrosion or damage is avoided. Connect the power to a non-switched AC wall outlet, or to the accessory outlet on the rear of another audio device in your system and you are ready to go! NOTE: When using the accessory outlet on another product to power the HD720 make certain that it has the ability to power a device that draws at least 14 watts of current in addition to the requirements of other devices that may be plugged into the accessory outlets. If you use a �switched� outlet, it is important to remember that the host product must be turned on in order for the HD720 to operate.
|
|
|
> |
|
|
Parse Time: 0.259 - Number of Queries: 112 - Query Time: 0.051